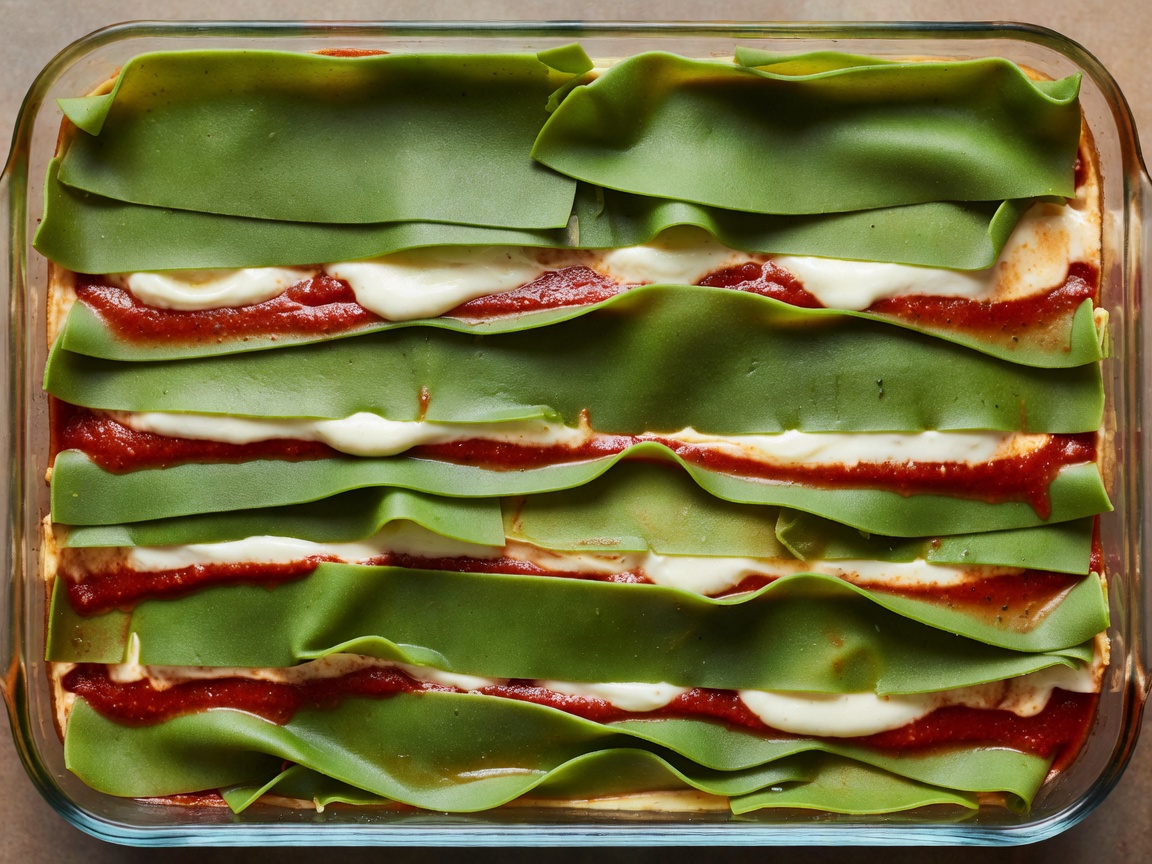
Pan Selection: Thermal Conductivity Matters
The choice of your baking vessel directly impacts how heat transfers through your lasagne. Heavy enameled cast iron or high-fired earthenware ceramic distributes heat gently, protecting the outer edges from scorching during a prolonged bake.
If you prefer thin, stamped aluminum or stainless steel baking pans, monitor your oven closely. Metal conducts heat rapidly, meaning bottom layers can dry out before the center has fully heated through. A baking dish with vertical, upright sides (measuring approximately 30cm by 22cm with a 6cm depth) offers the ideal geometry for supporting five to six balanced layers.
The Base Layer Foundation
Never place raw or blanched pasta sheets directly onto dry ceramic or metal. Doing so causes the pasta to stick to the pan bottom, turning hard, dry, and difficult to serve.
Begin by brushing the pan interior with room-temperature butter, followed by a thin, even ladle of warm béchamel sauce mixed with a spoonful of ragù pan juices. This protective layer lubricates the base, generates gentle steam as it heats, and ensures the bottom pasta sheet bakes into a tender, easily sliced layer.
The Alternating Grid Principle
When assembling your lasagne, lay pasta sheets lengthwise on the first layer. On the second layer, lay them crosswise. Continuing this perpendicular pattern throughout creates a reinforced woven matrix. When cut, this cross-grain structure holds clean, beautiful edges rather than sliding apart across the plate.
Step-by-Step Stratification Sequence
Follow this layer-by-layer sequence for clean slices and balanced flavour:
- Vessel Prep: Butter the base and sides of a deep rectangular baking dish. Spread 3 tablespoons of balsamella mixed with 1 tablespoon of ragù across the bottom.
- Layer 1 (Longitudinal): Lay blanched, dried pasta sheets flat across the dish, overlapping edges by no more than 5mm. Trim excess pasta with a paring knife.
- The Sauce Marbling: Ladle on an even layer of warm ragù. Drizzle a generous ladle of balsamella over the meat. Using the back of an offset spatula, swirl the two sauces lightly together so the rich meat is coated in silky cream.
- Cheese Application: Dust the layer with 25g to 30g of finely grated Parmigiano Reggiano PDO. Avoid heavy mounds; an even, snow-like dusting melts seamlessly into the sauces.
- Layers 2 through 4 (The Core): Repeat the cycle, alternating the orientation of the pasta sheets from transverse to longitudinal. Make sure to spread sauces all the way into the corners of the dish to keep the pasta edges moist during baking.
- Layer 5 (The Capstone): Lay down your final sheet of pasta. The top layer requires a different sauce ratio: coat the surface primarily with balsamella, adding only small dots of ragù. Cover the entire top generously with 40g of grated Parmigiano Reggiano. As it bakes, this mixture bubbles into a blistered, golden gratin crust.
Cheese Selection: Authenticity & Chemistry
In Emilia-Romagna, mozzarella cheese has no place in traditional Lasagne al Forno. Mozzarella contains high moisture and melts into stringy rubber bands that pull layers apart when sliced.
| Cheese Variety | Moisture Content | Melting Behaviour | Culinary Assessment |
|---|---|---|---|
| Parmigiano Reggiano PDO (24-Month) | Approx. 30% | Dissolves smoothly, adds savory umami richness | Authentic regional standard. Balanced crystallization. |
| Grana Padano PDO (16-Month) | Approx. 32% | Dissolves cleanly; slightly milder finish | Acceptable economic alternative to Parmigiano. |
| Fresh Whole Milk Mozzarella | Approx. 52%–60% | Releases liquid whey; stretches into strings | Traditional to Naples; avoid in Bolognese lasagne. |
| Whole Milk Ricotta | Approx. 70%–75% | Curdles and grains under heat; expels water | Not used in authentic Emilia-Romagna preparations. |
Layering Pitfalls and Preventive Measures
Best Layering Practices
- Spreading sauces all the way to the dish edges to protect pasta corners from curling.
- Keeping each sauce layer thin and balanced; too much sauce causes the dish to collapse when served.
- Gently pressing down on each new pasta sheet with flat palms to eliminate air pockets.
- Limiting total assembly to 5 or 6 pasta layers to ensure heat reaches the center evenly.
Mistakes to Avoid
- Leaving pasta corners dry and uncovered, which turns them into hard, unchewable crisps.
- Over-layering past the top rim of the pan, causing hot fat to boil over and burn in the oven.
- Stacking all pasta sheets in the same direction, which causes slices to slide apart on the plate.
- Piling thick mounds of grated cheese on internal layers, creating dense, rubbery seams.
With your lasagne neatly assembled, you are ready for the oven. If you plan to bake later, cover the dish tightly and refrigerate for up to 24 hours. When baking chilled lasagne, add 10 to 15 minutes of covered oven time to allow the core to warm through gently.